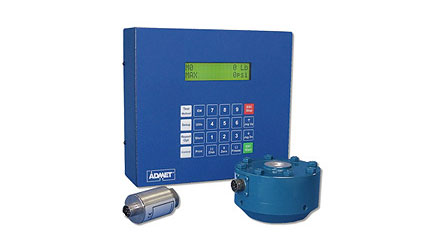
Gauge Buster 2 | Advanced Indicator
Unlike the MTESTQuattro and eP2 controllers, load indicators cannot control testing machines. Simply connect the Gauge Buster 2 with a load cell or pressure transducer to a machine capable of compressing or pulling materials, components, and devices to measure their live and peak load/stress.
Gauge Buster 2 is a versatile indicator designed for a variety of materials, product, remote on-site and force calibration testing applications. Features include an Auto-Test-Reset mode for hands free operation, bar graph load rate display, permanent storage of test data and easy transfer of results into data base programs. Its accuracy, which exceeds ASTM E4, ease-of-use and ruggedness results in a system of unrivaled price/performance.
GaugeSafe Communication software is available for users who need to store and export their test data to a PC.
- Top line displays active test method and either force or stress value
- Lower line displays testing rate as either a bar graph or numerically while the test is running.
- Display: Live Load, Maximum Load, Live Stress and Maximum Stress numerically.
- After test completes results are displayed numerically.
- Reports: Maximum Force, Maximum Stress, Specimen Geometry, Specimen Dimensions, Date, Time and Specimen Number.
- Define cylinder break type according to ASTM C39. Activate/De-Activate Cylinder ASTM C39 correction factor.
- Perform beam tests according to ASTM C78 and C293.
- GaugeBuster 2 comes standard with one analog input for measuring force and stress. Optional digital encoder and analog inputs can be installed to measure displacement or strain. Ideal for measuring Modulus of Elasticity or Poisson’s Ratio according to ASTM C469.
- Define specimen geometries as cylinder, cube, beam center point loading, beam-3rd point loading, round and general area.
- Auto-Test-Reset is standard and automatically enables the indicator for the start of the next test without requiring operator interaction.
- Auto-Store option available to automatically store the results of each test.
- Average load rate analysis available to calculate and report actual test speeds.
- Six calibration tables stored in permanent memory. Up to 10 calibration points with piecewise linear fit per table for maximum accuracy. Enables multiple load cells or load frames to be used with one GB2 Indicator.
- Store up to 6 test methods to permanent memory. Test methods enable the user to define and store cylinder, beam and cube test procedures to memory. With the press of a key they can be quickly recalled for fast efficient testing.
- Real-time numeric or graphical display of loading rate. User selectable units of Force per Minute, Force per Second, Stress per Minute, Stress per Second. This feature provides feedback to the operator so that they can adjust the test rate in accordance with ASTM requirements.
- Activate and report additional test report parameters including:
- Average Rate of Loading (automatically calculated by the GB 2)
- Operator ID (operator entered value)
- Specimen Weight (operator entered value)
- Specimen Age in days since cast (operator entered value)
- Cylinder Break Type (selected from list of ASTM C39 break types)
- Cylinder Cap Type (selected from list)
- Cylinder Correction Factor (automatically calculated by the GB 2)
- Store up to 2,000 test results to permanent memory.
- Includes digital output which can be used for machine shutdown for over load safety or unloading at specimen break
- Transmit via the USB communications port (standard) or USB flash drive (option) results, XY data, test methods and calibration data to a remote computer running ADMET’s GaugeSafe Data Exchange Program.

