While it is easy to imagine why bend testing needs to be performed on rigid materials like plastics (ASTM D790) and concrete (ASTM C1609), in reality bend test applications are common in a variety of industries. Universal testing machines equipped with bend fixtures are used to calculate flexural modulus, flexural strength, yield point, and more. This blog post will discuss the equipment required for common testing standards as well as equipment available for less common testing applications.
Definitions
Flexural strength is the maximum bending stress that the test specimen can sustain before it yields.
Flexural offset yield strength, which may be a different value than the flexural strength, is the stress at which the stress-strain curve deviates by a given strain (offset) from the tangent to the initial straight line portion of the curve.
Flexural strain is the nominal fractional change in the length of an element of the outer surface of the test specimen at midspan, where the maximum strain occurs.
Equipment
The two common types of bend fixtures are three-point and four-point bend fixtures.
Three-point bend fixtures: Configuration of flexural strength testing where a specimen is loaded at a location midway between two support bearings
Four-point bend fixtures: Configuration of flexural strength testing where a specimen is symmetrically loaded at two locations that are situated one quarter of the overall span, away from the outer two support bearings
Note: Depending on the industry, terminology may vary with the use of “three-point loading” and “four-point loading.”
ASTM D790 Bend Testing – Unreinforced and Reinforced Plastics and Electrical Insulating Materials
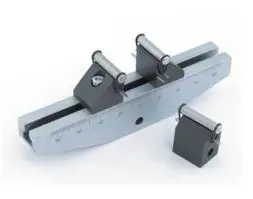
Cylindrical rollers for ASTM D790 bend testing
ASTM D790 is used to measure the flexural strength and flexural modulus of unreinforced and reinforced plastics, including high-modulus composites and electrical insulating materials. The standard includes detailed specifications on the recommended bend fixture for this type of testing, as listed below:
- The rectangular specimen is loaded by a loading nose midway between the supports (three-point-loading).
- The recommended support span-to-depth ratio per ASTM D790 is 16 to 1. A ratio larger than 16:1 may be necessary for laminated thermosetting materials and materials used for electrical insulation.
- The recommended loading nose and supports are cylindrical rollers.
- The default radii of the loading nose and supports are 5.0 ± 0.1 mm (0.197 ± 0.004 in).
- If default radii are not used, minimum recommended radius is 3.2 mm (1⁄8 in). For specimens 3.2 mm or greater in depth, the radius of the supports may be up to 1.6 times the specimen depth.
- The maximum radius of the loading nose shall be no more than four times the specimen depth.
- The specimen shall be long enough to allow for overhanging on each end of at least 10% of the support span (at least 6.4 mm (1⁄4 in) on each end).
ASTM C1609 Bend Testing – Fiber Reinforced Concrete Beams
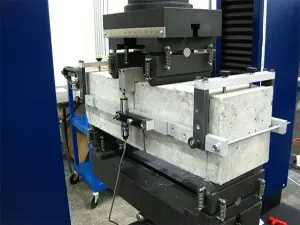
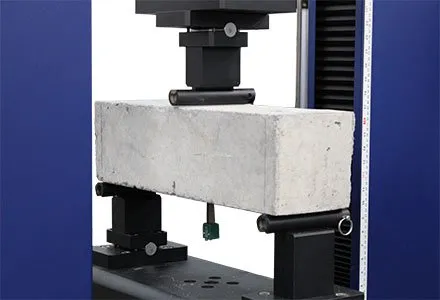
ASTM C1609 concrete bend testing fixture
ASTM C1609 is used to measure the flexural performance of fiber reinforced concrete beams. The purpose of ASTM C1609 is to not only determine the peak strength of the concrete but also to find the residual strength of the fibers after the first crack appears. For this reason, the test extends past the initial peak. The standard also specifies that the test must be performed in servo control at very slow net deflection rates. Net deflection is the average of two displacement sensors placed on either side of the specimen.
- Recommended specimen sizes per ASTM C1609 are:
- 150 by 150 by 500 mm (6 by 6 by 20 in)
- 100 by 100 by 350 mm (4 by 4 by 14 in)
- Two loading noses apply load on the top of the beam.
- For a 150 by 150 by 500 mm (6 by 6 by 20 in) beam, the spacing between the loading noses is 150 mm (6 in).
- For a 100 by 100 by 350 mm (4 by 4 by 14 in) beam, spacing between the loading noses is 300 mm (12 in).
- The 3rd point loading fixture features two supports underneath the beam.
- The distance between the two support points, or the span length, should be three times the specimen depth or 300 mm (12 in), whichever is greater.
- Loading nose and lower support rollers shall be able to rotate on their axes.
- A net deflection flex jig surrounds the beam and clamps to the beam at its neutral axis directly over the supports.
Two displacement transducers, one on each side of the beam, are mounted mid-span to measure beam deflection. The output of each transducer is averaged together to provide the net deflection measurement, ensuring accurate measurement of mid-span deflection and minimizing errors due to concrete specimen twisting or seating in the supports.
EN 14651 Bend Testing – Metallic Fibered Concrete
European Standard EN 14651 is the test method for measuring the flexural tensile strength of metallic fiber concrete. It is similar to ASTM C1609. The main differences are:
- The test specimen dimensions are 150 by 150 by 550 mm (6 by 6 by 22 in).
- One loading nose applies load on the top of the beam.
- The distance between the two lower support points, the span length, equals 500 mm (20 in).
- Loading nose and support rollers should be made from steel and should have circular cross-section with a 30 mm (1.2 in) diameter. Roller length should be at least 10 mm (0.4 in) longer than the width of the specimen.
- The loading nose and one of the support rollers should be articulating rollers, rotating freely around their axis.
- EN 14651 requires one transducer.
ASTM D2344 Shear Testing – Polymer Matrix Composite Materials
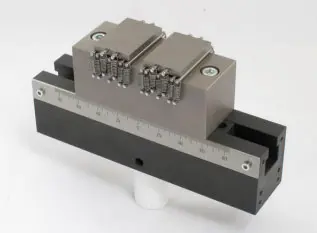
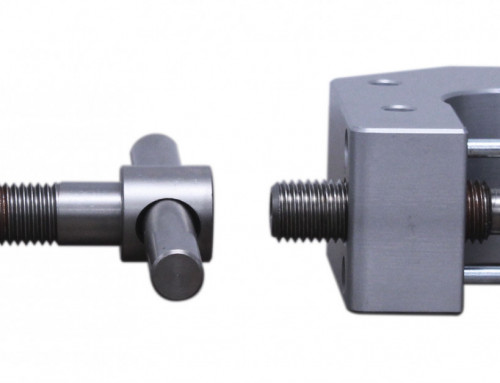
ASTM D2344 bend test fixture
ASTM D2344 is used to determine the short-beam strength of high-modulus fiber-reinforced composite materials. Short-beam strength refers to the shear stress developed at the specimen mid-plane at failure. The beam specimen is loaded in three-point bending using the specific bend fixture described in the standard.
- One loading nose applies load on the top of the beam. The specified diameter is 6 mm (0.25 in).
- The special support platen system with two moving slides features two supports underneath the beam. Support diameters are 3 mm (0.125 in).
- The distance between the two lower support points, the span length, equals 12 mm (0.5 in).
Loading nose and support rollers should have circular cross-sections.
ASTM C1161 Bend Testing – Ceramics
ASTM C1161 is used to determine the flexural strength of advanced ceramic materials using either a four-point or a three-point bend fixture. Keep in mind that the three-point flexural strength measurements will be higher than four-point flexural strengths. Using the four-point flexure is preferred and recommended for most characterization purposes.
- The standard lists three different configuration options shown in the table below:
| Configuration | Support Span | Loading Span | Roller Diameter |
| A | 20 mm (0.8 in) | 10 mm (0.4 in) | 2 to 2.5 mm (0.08 to 0.1 in) |
| B | 40 mm (1.6 in) | 20 mm (0.8 in) | 4.5 mm (0.18 in) |
| C | 80 mm (3.15 in) | 40 mm (1.6 in) | 9 mm (0.35 in) |
Loading nose and support rollers should have cylindrical cross-sections with independent articulation (depending on the specimen material, rollers may be semi-articulated or fully articulating).
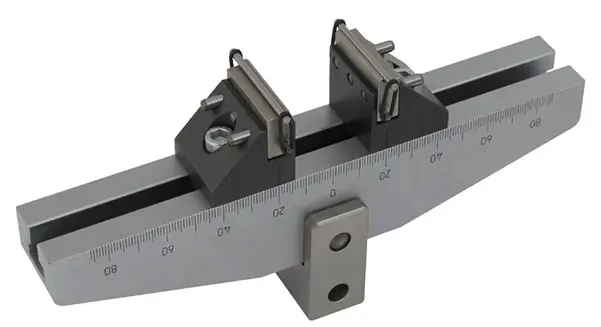
ASTM C1161 bend testing fixture
ASTM C158 Bend Testing – Glass
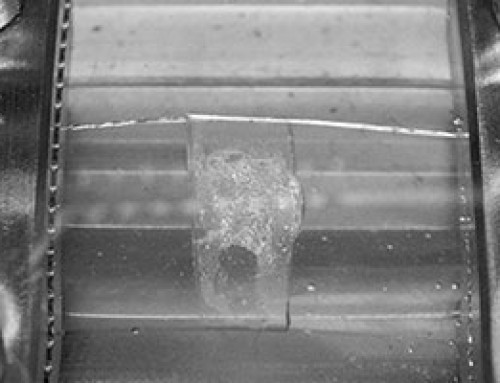
ASTM C158 is used to determine the modulus of rupture in bending, which is defined as the value of maximum tensile or compressive stress (whichever causes failure) of glass and glass-ceramic specimen. There are two test methods in ASTM C158:
Test Method A – Test For Modulus of Rupture of Flat Glass
Test Method B – Comparative Test for Modulus of Rupture of Glass and Glass Ceramics
The below description is for a four-point bend fixture required for Test Method A that is possible with large specimen sizes specified in the standard.
- The test specimen dimensions are 250 mm (10 in) in length and 38.1 mm (1/8 in) in width.
- Loading noses and support rollers should have cylindrical cross-sections and 3-mm (1⁄8-in.) radii.
- The distance between the two upper loading noses equals 100 mm (4 in).
- The distance between the two lower support points, the span length, equals 200 mm (8 in).
Customizing a Bend Fixture with Different Loading Noses & Supports
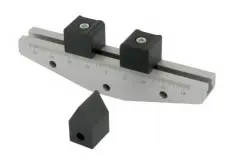
Hardened supports on a standard bend fixture
Not all tests follow a testing standard. Materials and products are also tested following custom testing procedures that may require non-standard equipment. Bend fixtures may be ordered with different span lengths and span widths. What makes a bend fixture unique to the specimen and application it is used for is the customization of loading noses and supports.
The most standard, hardened supports come with the following radius options: 0.5, 1, 1.5, 2, 3.2, 5, and 10 mm. Lower supports come with two of the radius options listed above to give the user flexibility over the selected radius.
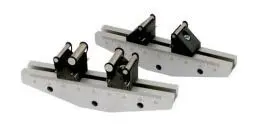
Adjustable rollers
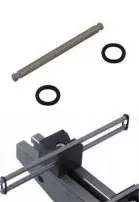
Interchangeable rollers
Interchangeable rollers are cylindrical rollers that are attached into place using O-rings. This attachment allows the length of the cylinders to be greater than the width of the span width and gives users the ability to select and interchange two different roller diameters.
Glass specimen can be tested using the special flat supports shown below.
Also shown are movable lower supports with needle-roller bearings.
Longer supports with 1mm radius as well as large-width supports are available for running various testing procedures with different sample material.
Note that bars without loading noses and supports can be ordered as well as fixture configurations that can be used to run both 3-point and 4-point testing.
- Bend fixture support for glass samples
- Fixture with needle-roller bearings
- Wide sample support
- Longer specimen support
Have a question about finding the right bend testing equipment?


